You open the cabinet for one sponge and knock over three bottles. The fix usually starts with a clearer layout, not a bigger organizer: keep your everyday supplies easy to lift out, give plumbing its own open space, and stop treating every spare inch as storage.
This walkthrough helps you map the cabinet you actually have, sort what belongs there, and try a simple arrangement before spending money. You can use it in a kitchen or bathroom, but let the cabinet’s condition and your household’s safety needs decide what stays.
Empty the space before choosing containers
Put a towel on the floor and move everything onto it so you can see the full inventory. Keep bottles upright, leave their labels attached, and set leaking or damaged packages apart rather than slipping them into a new basket.
Group the contents by the job you use them for: dishes, routine wiping, bathroom cleaning, and spare supplies. If you discover three partly used versions of the same cleaner, pick one to keep accessible without combining the liquids.
Now look at the empty cabinet floor, corners, and back panel with a flashlight. A dark stain isn’t a diagnosis, but dampness, swelling, an active drip, or a musty smell means this organizing project needs to pause while you investigate the underlying problem.
The EPA’s moisture guidance emphasizes fixing water problems and drying affected materials promptly. Don’t cover a wet cabinet base with a liner or a tightly packed bin and call the issue solved.
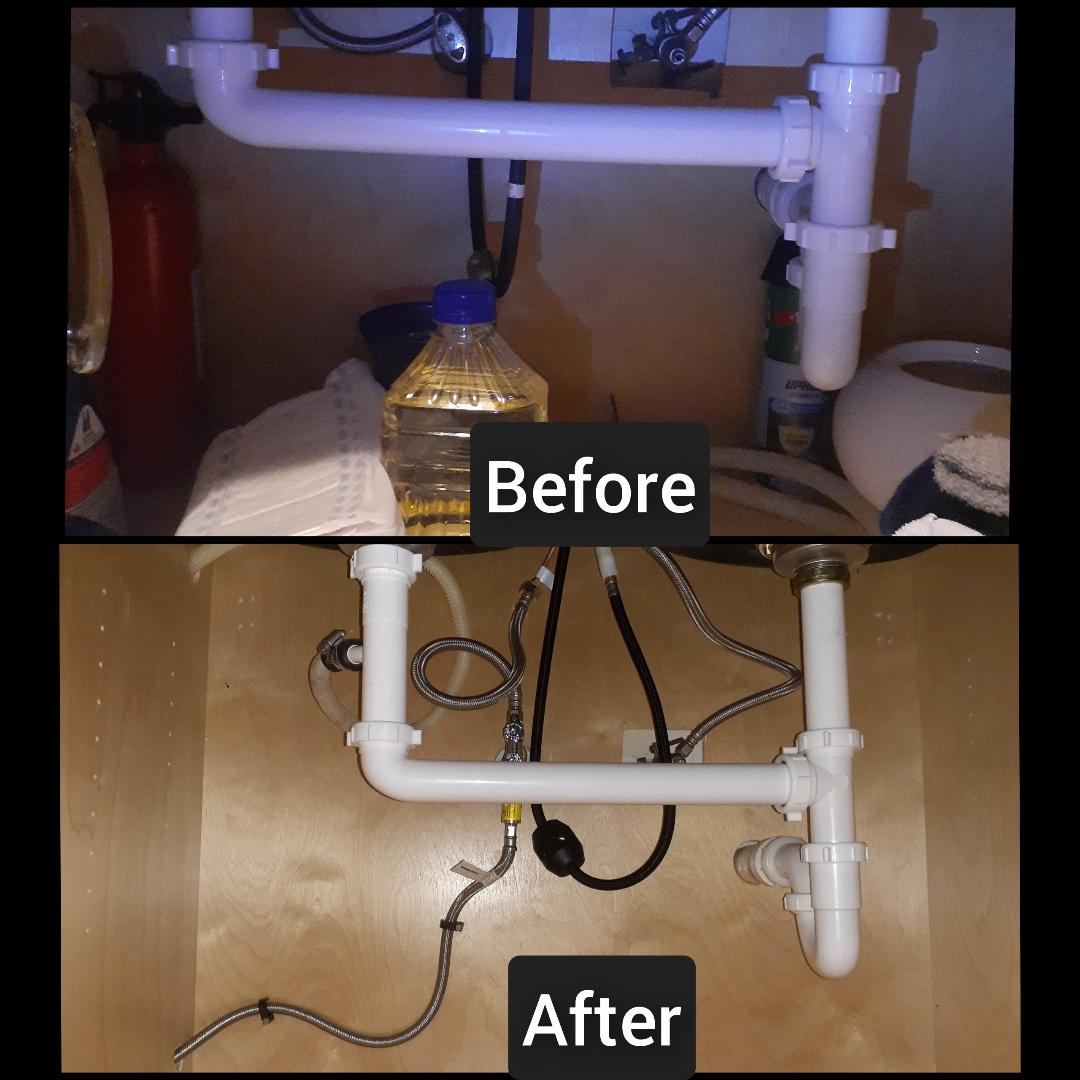

Measure the usable space, not just the cabinet
Write down the inside width at the narrowest opening, the usable depth with the door closed, and the height beneath the lowest obstruction. Include the center stile, door hinges, disposal housing, supply hoses, and any hardware that steals room from a pullout.
A container can fit on the cabinet floor and still be impossible to remove through the door. Test the whole path: can you lift its handle, tilt it without hitting a pipe, and set it down without balancing bottles against your knee?
Use a flattened cardboard box to make a rough footprint before shopping. Fold it to the candidate bin’s outside dimensions, then place your tallest everyday bottle inside the mockup and close the door gently.
Measure each side separately if your plumbing divides the cabinet. Two narrow containers may be more useful than one wide drawer, especially when one side has a disposal and the other has a relatively clear rectangle.
For example, a bin that fits a fourteen-inch interior section might still catch on a narrower door opening. Write both numbers in your note and test the removal angle with cardboard, especially if the handle rises above the bin or a trigger bottle adds extra height.
Give access its own zone
Think of the cabinet as three working areas: an easy-to-reach front zone, a less convenient side or rear zone, and an open service zone around plumbing. The service zone isn’t wasted storage; it’s what lets you inspect the cabinet without unpacking your entire cleaning supply collection.
Put the supplies you use together into one removable caddy near the front. A dishwashing group might contain the current dish soap refill and a dry spare brush, while a bathroom group might hold a dedicated cleaning cloth and the product appropriate for that surface.
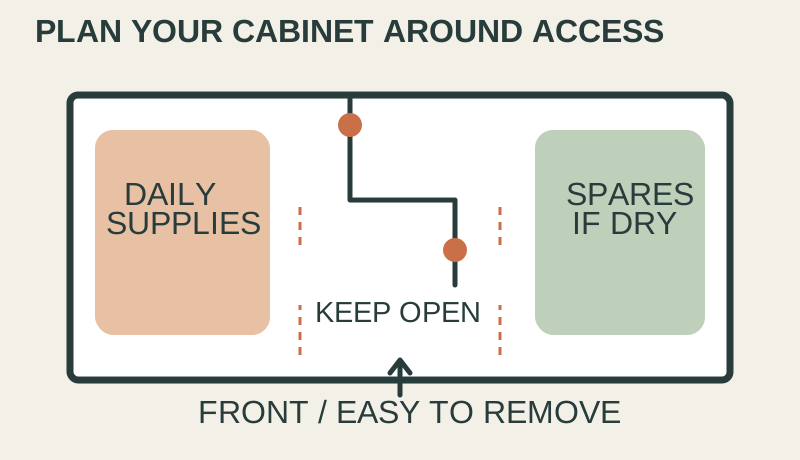
Keep the path to shutoff valves and drain connections visibly clear, and don’t hang storage from pipes or flexible hoses. If you can’t identify what a fitting does, leave it alone and ask your landlord or plumber before adding anything around it.
Your rear zone is a reasonable place for occasional supplies only when you can remove them without disturbing the plumbing. Avoid building an arrangement that requires you to disconnect, bend, or push equipment out of the way.
Decide what belongs somewhere else
Paper towels, cardboard refill boxes, and a year’s worth of sponges can consume space you need for everyday access. Consider moving dry backup supplies to a suitable shelf elsewhere, especially if this cabinet has a history of leaks.
If young children can reach the cabinet, convenience doesn’t determine chemical storage. CPSC advises keeping cleaning chemicals in original child-resistant containers, in a locked cabinet or box and out of children’s reach.
A pretty open basket doesn’t meet that need by itself, and a child-resistant cap isn’t a reason to leave a product accessible. Choose a secure storage location first, then organize inside that boundary; you may end up keeping only nonchemical supplies under this sink.
Also move items that belong to another routine instead of forcing them into a miscellaneous bin. A screwdriver used once during a faucet repair can return to your tool storage, and unopened toiletries can join the rest of your bathroom backups.
Choose the simplest organizer that works
Start with a washable bin you already own, provided it’s suitable for the contents and easy to lift. An open container makes labels visible and lets you notice spills without removing a stack of matching lids.
A two-tier rack can help when you have clear height on one side, but it doesn’t create clearance through a pipe. Check the upper shelf with your actual bottle heights and remember that the lower level still needs enough room for your hand.
A turntable can make sense for short bottles in a broad, unobstructed area. It becomes frustrating when tall triggers catch on plumbing, the back edge hits the cabinet wall, or one oversized bottle blocks the rest of the circle.
Door-mounted storage needs a separate check for hinge movement, shelf collisions, and the door’s construction. In a rental, get the required permission before drilling; don’t assume an adhesive or over-door accessory is suitable for your finish or load.
Run a one-week trial before adding labels
Put back only the supplies you chose and take a quick reference photo of the arrangement. Use temporary paper labels if two people share the space, keeping product instructions and hazard information fully visible.
During your normal routine, notice which movements feel awkward. If you have to lift a heavy refill every time you want a cloth, swap their positions; if a bottle tips when you remove its neighbor, give the group more space.
Try the layout with wet hands and with the door opened only as far as your kitchen traffic allows. You don’t need a timed performance test, just an honest check that the arrangement works under the conditions you use it.
At the end of the week, remove anything you never needed and review any new dampness or residue. Buy a specific organizer only when you can name the problem it solves, such as a narrow caddy that lifts out through an obstructed opening.
Make the reset easy to repeat
Whenever you replace an everyday bottle, use that moment to glance at the cabinet base and the area behind it. Keeping fewer objects here makes that small inspection easier, but no storage accessory replaces a repair when something leaks.
Return reusable cleaning tools only after following their care instructions and letting them dry appropriately. Give dirty cloths a separate laundry destination so your clean supply caddy doesn’t become a holding bin for damp fabric.
Keep your measurements in a phone note, including the opening width and the obstruction that mattered most. When you eventually replace a container, you’ll be comparing it with your cabinet rather than relying on an attractive product photo.
A useful finish line is simple: you can find the current supplies, lift out a group with one hand when appropriate, and reach the service area without a major cleanout. If that works with two mismatched bins, your cabinet is already doing its job.
Sources & approach
Researched October 22, 2026. Recommendations follow the documented features and the household scenarios explained above.